
This tutorial is a great way to learn a super simple hand stitching technique which can also then be applied to other leather wares. Have I piqued your interest yet?
You’ll need:
- leather iPad sleeve
- 30 inches of stainless steel curb chain
- 5 yards of waxed linen cord
- all purpose rotary punch
- an embroidery needle
- wire cutters or bolt cutter (optional)
- scissors

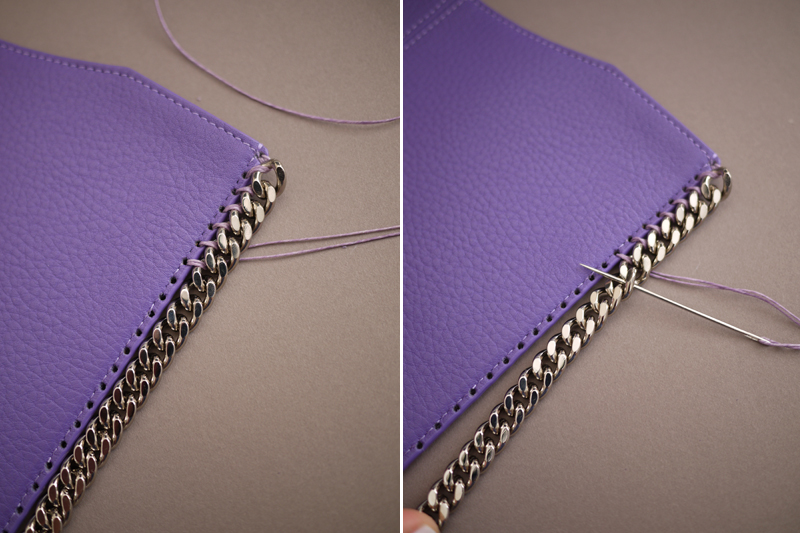
Start by setting the rotary punch to the smallest hole setting. Create a hole in the upper right corner, making sure to punch just outside the seam but without cutting into the outer edge of the leather sleeve.


Each chain link is approximately 5 millimeters apart, therefore the holes should be spread apart with the same distance. Continue punching holes around the perimeter of the sleeve.
Thread the needle with the waxed linen cord and tie a double knot at the end. Pull the thread through the first hole and pass the needle through the same hole again, making the first stitch.


Happy Crafting!
Post a Comment