I made this fringe top with a tank top, this could totally be done with a shirt you already own.
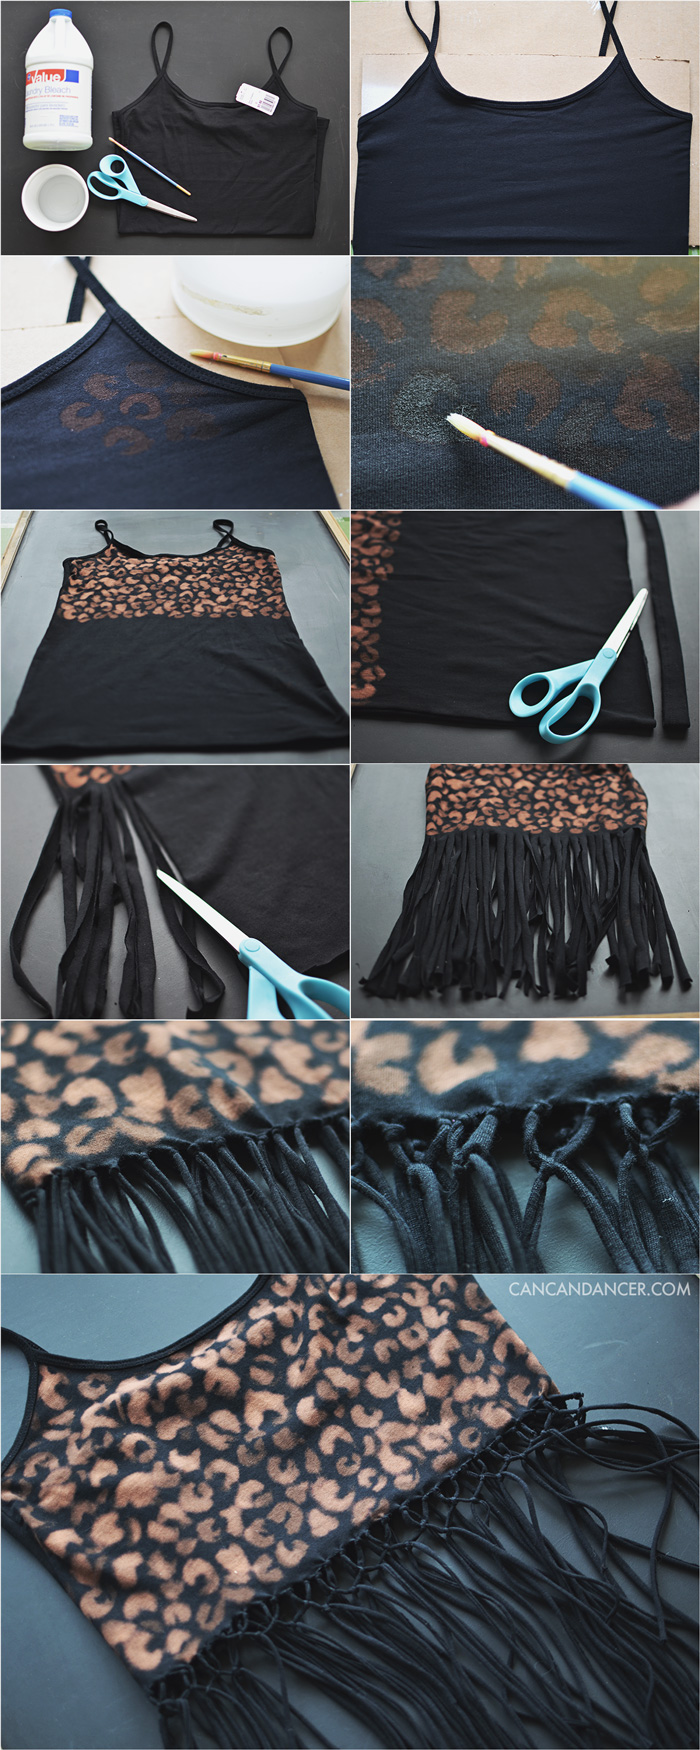
1. Gather your supplies: bleach, a container partially filled with water, a tank top, paintbrush, scissors, and cardboard.
2. Slide your cardboard into your shirt, so the bleach doesn’t bleed through inconsistently.
3. If you use straight bleach on your shirt, it might eat right through the fabric. Dilute it by first adding a tablespoon to half a cup of water. If that is too weak, add more bleach. Also be sure to do this project in a well-ventilated area.
4. Dip your brush in your diluted bleach, and start ‘painting’ your design on your shirt. Tip: draw your design smaller than you desire, the bleach with spread slightly. That’s why my cheetah spots are a little bloated.
5. Continue until you have painted out your entire design. If you want spots brighter, you can go over them again with more bleach.
6. Cut the bottom hem off your shirt.
7. Cut up towards the top of your tank, in either half inch or quarter inch sections. Make your fringe as long or short as you want.
8. Once you have completely cut your fringe pieces, gently pull on each string so it curls up on itself.
9. Tie a knot at the base of each fringe piece if you want your fringe pieces to be skinny all the way up.
10. You can leave your tank like this, or create a crisscross pattern like I did. I just knotted each fringe piece with its neighbor.
11. I did this a second time by tying each fringe piece again with its neighbor. You could continue all the way to the bottom if you wanted a weaved look.
12. Trim any pieces that seem a little too long. Pop that baby on and twirl around- you know you want to. 
Happy Crafting!
Post a Comment